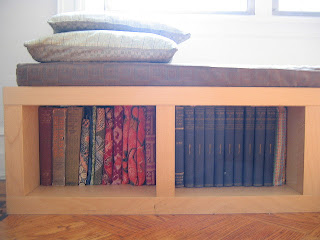
It seems summer might just be on its way, and as you never know how long it's going to last it pays to make the most of this lovely weather as soon as it appears. The instructions here are suitable for bench cushions that you will use outside as well as inside, with special considerations that you might need to make for each.
Relaxing on a bench seat by a window, or soaking up the rays in the garden - you have the power to style!
Choose the Right Materials
Whether your focus is on how to make bench cushions for outdoor use, or indoor use, the basic principles for making them both are the same. The only extra consideration that you need to make for outdoor bench cushions, should focus on what kind of fabric you are using, as your cushions will be exposed to Mother Nature.
The two main things to consider within this are:
- Is the fabric you have chosen fade-resistant - especially important if you have picked a dark color.
- How likely are your cushions to be left out in the rain - in which case some waterproofing medium might be needed.
- Tape measure
- Upholstery fabric, or thick fabric that will stand up to wear
- Piping cord (optional)
- Foam padding - try using some environmentally friendly foam cushions
- Sewing machine (although it will take longer to do so, sewing bench cushions by hand is perfectly do-able)
- Waterproof silicon spray (optional - for outdoor bench cushions)

Measuring & Cutting Out
Just as in any other aspect of home decorating, preparation is the key, and with making bench cushions, measuring is the preparation. This is very important to get right, to not only make certain of a good fit, but to ensure no fabric is wasted - or even worse you don't buy enough fabric, meaning another trip to the store and added expense.
- Measure the length and width of your bench seat, and order, or cut to size, a piece of foam. If you require a deeper cushion then you can place two pieces on top of one another.
- Measure the depth of the foam.
- Add together the length and width measurements and multiply this by 2, then add 1 inch. We will call this (A).
- Now cut out a strip of fabric to the length (A), by the depth measurement plus 1 inch. This will create the seat surround. If you are using cord piping then cut another strip to this same length but only 1 inch wide.
- Cut out two pieces of fabric to your length and width measurements, adding 1 inch to each. This will create the bench cushion, top and bottom.
Making the Cushions
Now the maths is over, it's time to get on with the actual making. If you aren't using piping cord then start at bulletpoint 2:
- If you are using piping cord in making your bench cushions, then use the strip of fabric you cut before and place the cord down the center. Fold one side over to the other, and stitch down it, enclosing the piping cord inside. Pin this around the edge of the top cushion fabric allowing for a 1/2 inch seam.
- Pin the seat surround, around the edge of the top cushion piece of fabric, allowing for a 1/2 inch seam (if you are using piping cord this should now be sandwiched between the top cushion section and the seat surround. Make sure that the right sides of fabric are facing each other before sewing into place.
- Pin the bottom cushion section to the bottom edge of the seat surround, again allowing for a 1/2 inch seam.
- Sew around 3 edges - the 2 longest edges, and 1 of the shortest.
- Turn the cover the right way around. Press out the seams, before pushing the foam inside the cover, from the shorter end you didn't sew.
- Fold in 1/2 inch fabric from this open end at the seat surround and at the seat bottom - make sure they are in line with the other seams so no raw edges can be seen. Neatly sew this section, joining these remaining items together.
After completing these steps in how to make bench cushions, you may want to weatherproof your cushions for outdoor use. Simply spray with a waterproof silicon spray once the item is finished, and leave for a few hours for the substance to completely dry, and penetrate the fabric. Now the process is complete - bench cushions made the easy way! http://fmiqed.blogspot.co.uk


0 komentar:
Posting Komentar